Spotlight: Macaron Class Tips

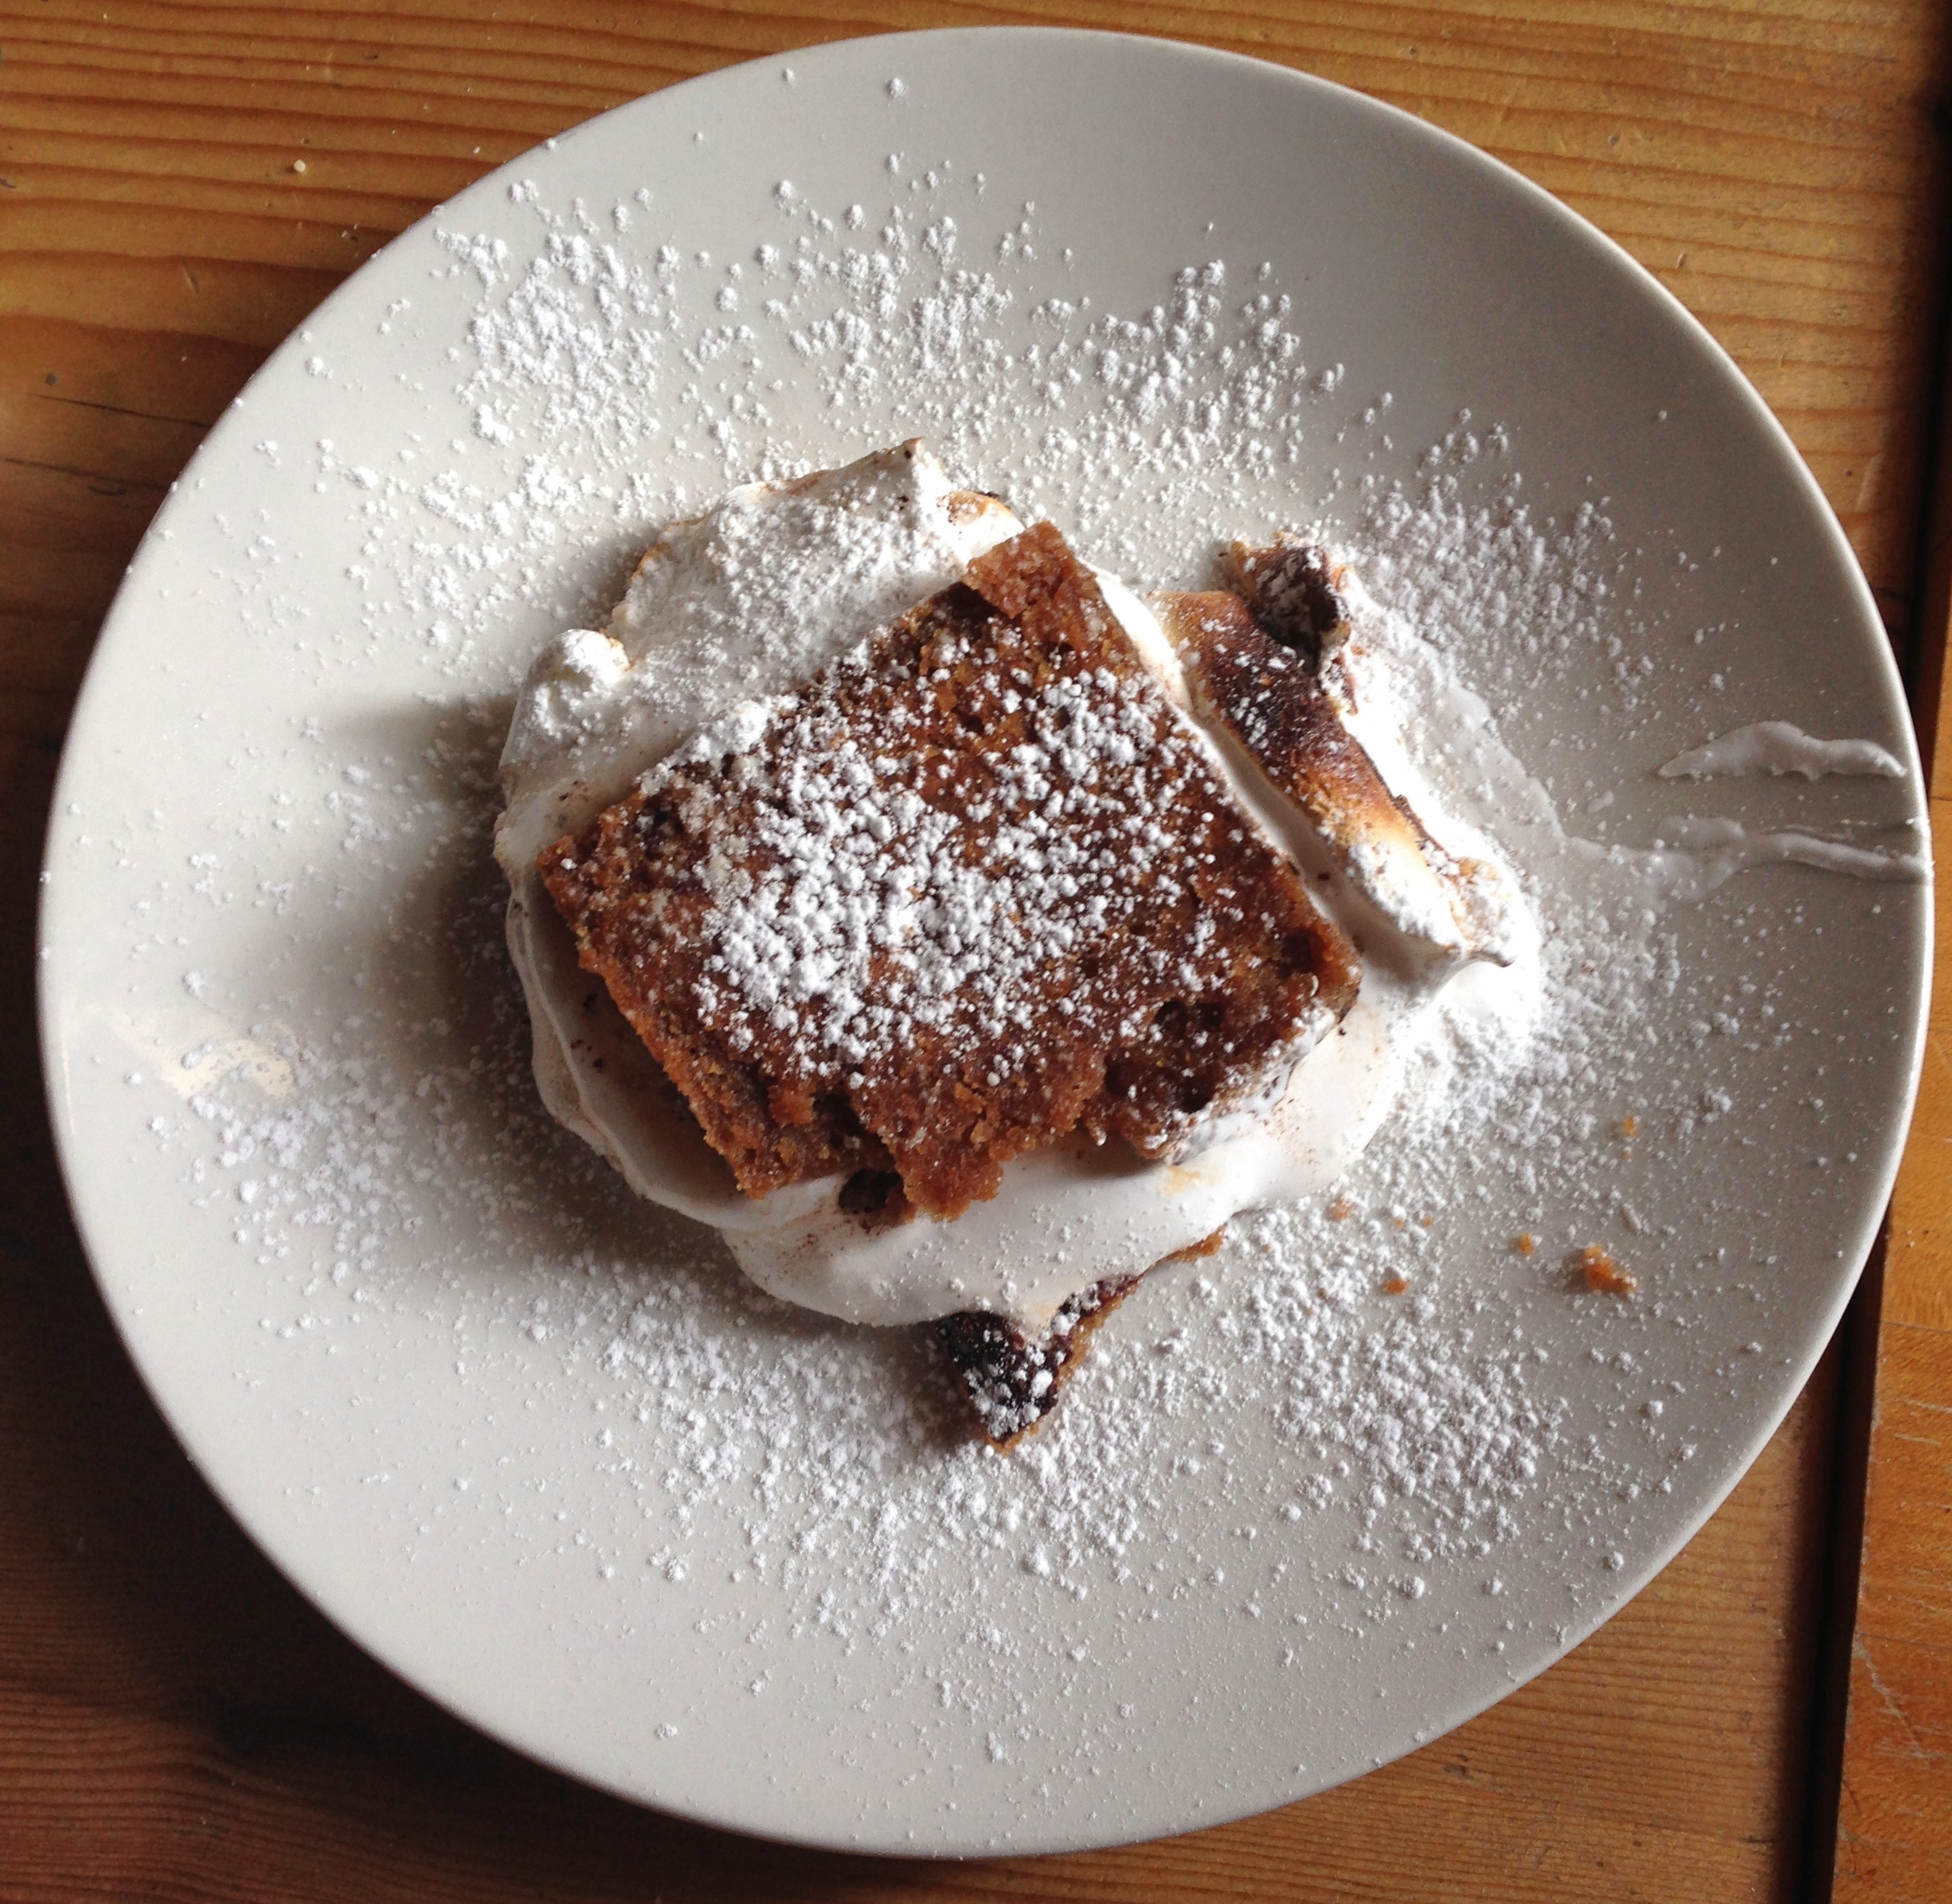
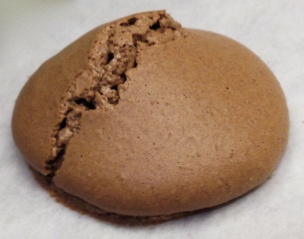
After taking the macaron class at Mille Feuille and reflecting on the initial experience, I wanted to share some of the tips imparted on the participants to avoid mishaps like the shell shown below. I know I will be using these to guide my first at-home attempt to make these French delights!

IMG_7413 _SnapseedThe Batter

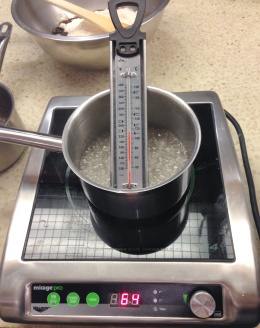
  • When making the initial sugar syrup for the Italian meringue, it is important to heat to 245 degrees. Too hot, and the meringue will be too elastic. Too cold, and the meringue will be too loose or soft.
  • Use day-old egg whites for the meringue to achieve the right consistency. Separate and refrigerate a day in advance, as they slowly start to break down.
  • Avoid over-mixing at all costs. You cannot continue with the macarons if you over-mix, because the batter will be too runny.
  • When testing the consistency of the batter, if the ribbon from the pastry scraper breaks, it indicates it is under-mixed.

Baking

  • If you do not allow the shells to properly dry after initial piping, they can crack in the oven.
  • If you do not bang the air bubbles out and flatten the batter properly, the shells can crack.

IMG_7439 _SnapseedThe Filling

  • If you plan to use a fruit filling like a jam, bake a little longer (roughly 30 seconds), as it will cause the shells to be soggier after assembly.
  • If you want to use a fruit filling, only use preserves. Jelly should not be considered an appropriate substitute, as it lacks the concentration of fruit and flavor, as well as consistency required to be a good macaron filling.
  • To cool your ganache quickly, spread onto baking sheet lined with parchment paper and pop into fridge.

Assembly

  • When piping the ganache, complete one sandwich first. This will allow you to see how the consistency moves with the weight of the second shell – you may need more or less the next time, and you won’t have completed a whole row with too much or too little filling.
  • Do not push on the center to sandwich them, as you could cause them to crack.

Serving

  • If you use buttercream to fill the shells, you will need to pull the macarons out of the fridge roughly 20 minutes ahead of when you would like to serve them. They should not be left out for too long, or the butter will start to melt.

Hopefully the tips and tricks above help you avoid any classic macaron mistakes!

Until next time,
SugarSource


Spotlight: Macaron Class

IMG_7446 _SnapseedOn a windy cold day in February, I am embarked on my second Mille Feuille class to learn the art of the macaron. We began with an introduction to the chef, a round of hand-washing and tying plastic aprons on, and we were off to the races.

IMG_7418 _Snapseed
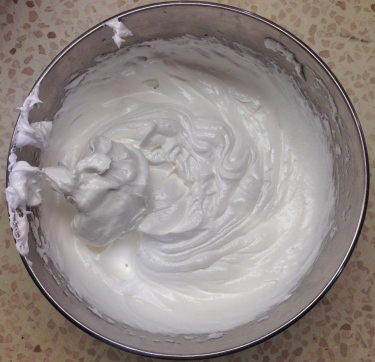
First, we combined sugar and water in a saucepan, heating until 245 degrees. As the mixture was warming, we beat egg whites together until the frothiness disappeared. At peak temperature, we added the sugar into the egg whites, beating at a high speed until stiff shiny peaks appeared and the bowl itself started to cool. The mixture should look uniform – when the sugar is first introduced, the edges will still look foamy. This is called Italian meringue, and is the only type of meringue you can use for the batter.

In a separate larger mixing bowl, we combined almond flour, powdered sugar, egg whites and food coloring (if needed). After quartering the Italian meringue, we added it to the almond flour batter one quarter at a time. With the first two rounds we used a firm spoon, and a softer spatula with the last two, focusing on folding in the meringue. We looked for consistency in color and texture, and were careful to to avoid over-mixing. At the end of the mixing process, there were slight waves in the dough and when picked up with a pastry scraper, each batter had a consistent ribbon flow from the edge.

IMG_7432 _Snapseed
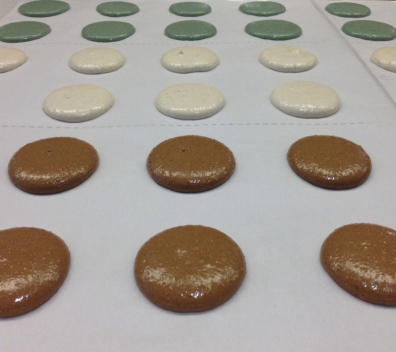
Pipe the dough onto a baking sheet covered in parchment paper. Each participant had a grid of small circles underneath the parchment to help guide us toward evenly sized and spaced shells. We started in the middle of each circle, flipping the bag completely straight downward and squeezing slowly 1/4″ away from the parchment paper. This allowed the circle to fill evenly without creating peaks. After completing a row (or two), we picked up our trays and banged on the bottom. This got rid of air bubbles and also helped to flatten the cookies for a shiny smooth texture. Once the sheet was full, our instructor placed them in a warm area to dry for 20-24 minutes.

We tested the shells by lightly tapping on the top with a fingertip – if any batter stuck, they were not quite ready. Once our fingers came away clean, the trays went into the oven.

While they baked, we prepared the ganaches, making vanilla, pistachio and chocolate to complement the three doughs made earlier. IMG_7434 _Snapseed
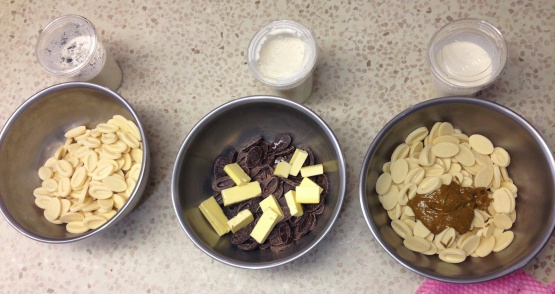
Each began by boiling cream until it just started to froth, then immediately adding it to a combination of chocolate, flavoring and, in the case of the chocolate ganache, butter. Once combined, we whipped with a whisk until it completely smooth. We were also treated to macaron samples as we waited. The espresso was rich and intense, the green tea matcha was earthy and captured the essence of the flavor, and the raspberry was sharp and full-bodied.

Once the baking is complete and the macarons have cooled for several minutes, we slid the parchment paper off of the baking sheet. Placing another sheet of paper over the macarons, we were then instructed to flip them in one fluid motion, pulling the top long-side corners together and away from us. It was slightly terrifying, but the macarons stick to the initial paper without issue. Using a tray with a sharp edge, we separated the parchment paper from the shells. I was quite cautious with this step, and it took me a few minutes. You can apply more pressure than you think without ruining them!

IMG_7449 _Snapseed
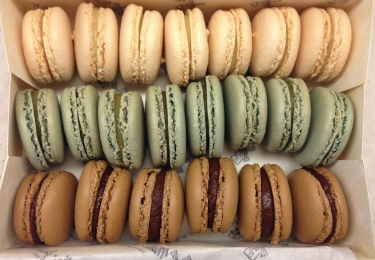
We then matched up each kind by size – mine were nowhere near uniform, and you want similar-sized macarons for each sandwich. Typically it is better to wait 24-36 hours before filling the shells. However, if you can’t wait – like in a 2.5 hour class – you can spray the shells with water (very lightly) before filling. We piped the ganache in a similar fashion to the shells, leaving a slight border. After completing a row, I placed each corresponding shell on top and lightly twisted the two together.

Once complete macarons can last up to five days in the fridge, or a few weeks in the freezer. The experience was delightful and less intimidating than I thought it would be. I would not have attempted to bake these myself without the class, and now I am excited to try it on my own sometime soon!

Until next time,
SugarSource

Spotlight: Croissant Class – Take Two

IMG_7298 _Snapseed
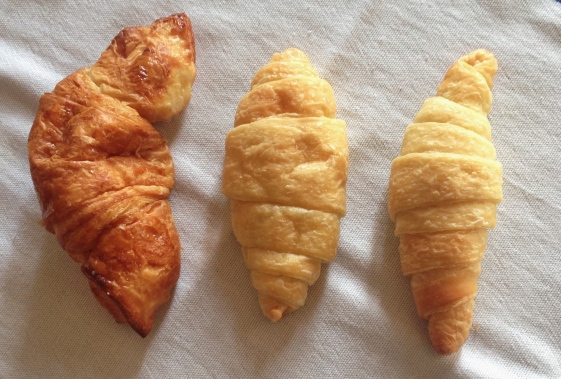
After initially taking the croissant class at Mille Feuille in December, I thought I was ready to tackle baking croissants. The course may have left me a little overconfident, and my first batch proved to be less-than-appetizing. With that in mind, I wanted to share my top tips:

  • Do not let the dough proof before you have rolled and assembled your croissants. Upon departing Mille Feuille, I proceeded to run errands for hours, allowing the dough plenty of opportunity to rise in my purse. Though it did not make it mess, it did complicate the rolling and proofing process once I was ready to make use of it.
  • Related, but somewhat different: do not allow your dough to get too warm. The butter will start to melt, reducing the overall flakiness of the pastries.
  • Do not attempt to use the dough after a few days. The yeast will slowly lose its ability to activate.
  • Do use a good amount of flour to help with the rolling process, but do not forget to brush it off before you assemble or proof the pastries. Excess flour can lead to a bitter or distorted taste.
  • If you do not have a convection oven, placing an empty baking sheet below the sheet with pastries helps to create a convection-like environment.
  • Do not forget the egg wash step after proofing! Croissants have that beautiful golden-brown hue because of this step and it should not be overlooked. Otherwise, they may turn out like the above!

I will give croissants another shot, from start to finish in my own kitchen, using the directions provided by the instructor.

Until next time,
SugarSource

NYC Spotlight: High Tea at The Plaza

IMG_7119 _Snapseed

High tea is a rare indulgence, and The Plaza’s Palm Court is quite the decadent place for such an occasion. I finally took the plunge, as it was a bucket list item of mine, and did not regret it!

Nestled into one of the green velvety booths, we poured over the tea menu to make our selections while taking in the opulent dining room. Gorgeous flower arrangements, shiny mirrored surfaces and the clientele all provided quite the sensory experience.

IMG_7121 _Snapseed
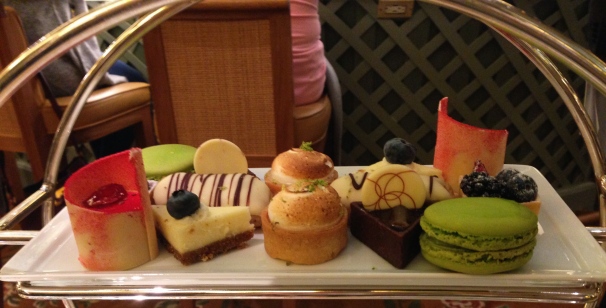
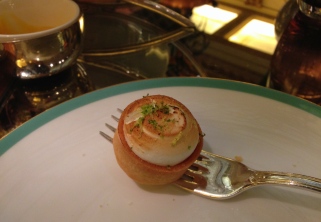
After placing our order, we clinked our glasses – in a truly luxurious move, we chose to accompany our afternoon tea with champagne – and continued to take in our surroundings. Before we knew it, our individual pots of tea arrived with cards confirming our selections, followed closely by a three-tiered golden tray. The table provided a reflection of our miniature sandwiches – traditional crustless cucumber, lox (for a nod to the Big Apple), egg salad, turkey and cranberry, chicken salad and an itty bitty roast beef baguette. They were quite filling for being so small!

The scones were warm and enveloped in a silken napkin. The small pots of devonshire cream, lemon curd and preserves were quickly employed on the surfaces of the plain scones, adding a rich sweetness to the dense texture and melting from the subtle heat. The seasonal scones did not seem to warrant such an accompaniment, and were also wonderful (I saved mine for consumption later).

IMG_7125 _Snapseed
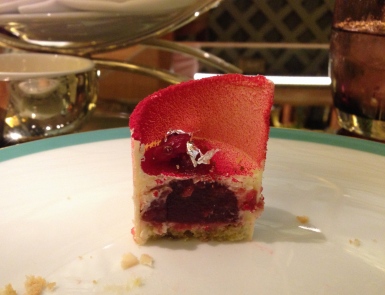
The desserts, the true highlight, were delightful. The miniature key lime tart was sweet, the meringue spongy and the filling had a bite to it. The fruit tart was tiny, and the berries made a strong statement. I am not a fan of cheesecake, generally speaking, but was happy to sample the Plaza’s version (though unfortunately it did not convert me completely). The tiny black and white eclair was quickly forgotten, while the intensely chocolately orange triangle was the highlight, flavor-wise. The most stunning execution was the white chocolate and cranberry cake, which made up for the lack of strong fruit notes with the beauty of the assembled package, while the pistachio macaron turned into my second to-go item.

It is quite the filling experience. I recommend replacing lunch with such an excursion, as the trays provide more than enough sustenance for a meal. Absolutely worth trying once, I don’t anticipate I will turn into a Plaza regular any time soon!

Until next time,
SugarSource

Spotlight: Croissant Class – Take One

IMG_7179 _Snapseed
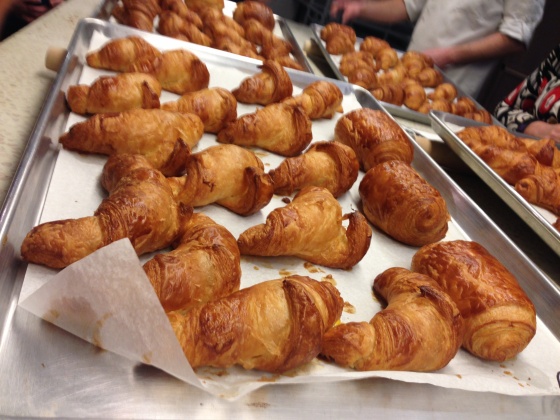
I finally took the plunge, and signed up for a croissant class at Mille Feuille‘s Laguardia Place location in Greenwich Village this December. As a huge fan of their croissants for years, this felt like the appropriate place to begin my tutelage.

The participants slowly began trickling into the back of the small storefront. Our instructor introduced himself, provided aprons for everyone and started class. We began by shaping our croissants, as they needed to proof before baking. Typically baking croissants is a three-day process, but this has been condensed considerably for this three-hour course! Our instructor walked us through the basic shapes and techniques, and provided constructive criticism to improve our individual trays of treats. After we had worked our way through the dough provided, rolling as carefully as possible, he popped them into the proofing drawer.

From there, he demonstrated the butter-layering process. I am embarrassed to say I had no idea how much butter was added to these delightful breads. After beating our slabs of butter into rectangular shapes, we slowly began the rolling, folding and re-rolling process. It was quite the lower arm work-out, and I was thankful to be moving around, as the air-conditioning made the room chilly. Our instructor would later inform us that it needed to be relatively cold in the room to ensure the butter did not begin to melt, which would ruin the croissants. They do recommend bringing an extra sweater in the event it is too cold!

After the croissants were done proofing, we slathered them in egg wash, re-arranged them on our trays for optimal baking, and then he placed them into the oven. He used a few of the leftover slivers as “appetizers,” and they were a delicious way to create a natural break for the class. I only wish they had provided the hot drink (described online), but unfortunately one was never offered.

Finally, he showed us how to make the dough and how to test if the gluten has been activated. A pro tip: if the gluten has been activated, croissant dough can be used as pizza dough instead!

All in all, the session was very informative, and I left the bakery with over 15 croissants and my own butter-layered dough for baking my next versions at home.

I would absolutely recommend it to anyone looking to learn more about how croissants are made or to hone their baking skills. Next up will be the macaron class!

Until next time,
SugarSource

Unexpected Find: S’more, please!

IMG_7089 _SnapseedToby’s Public House in South Slope, Brooklyn is a well-established pizza place. The smoked pancetta pie is a personal favorite, beautifully combining exceptional ingredients to create an incredible experience. But today is not about the pizza. It is about the unexpected and delightful dessert offered at this restaurant.

We knew the s’mores were arriving at the table before we saw them because we could smell them, specifically the wonderful smell of melted chocolate. IMG_7088 _SnapseedQuickly the dessert came into view, and the table audibly reacted. The s’more was oozing with marshmallow that was toasted to a fine caramel sheen on the edges. The homemade “graham cracker” was sizable, but could not contain the rambunctious mallow. We quickly dove in with our forks, discovering the melted chunks of dark chocolate hidden within.

It was sizable enough to satiate four adults post-pizza, and well worth the short wait. The wood-fired roasting technique of the dish tips it into the realm of absolutely delicious. This dessert has been added to the “must order” list at Toby’s, that is for certain.

Until next time,
SugarSource

Spotlight: Ladureé Ladureé

Another birthday has come and gone and would not have been complete without a box of Ladureé macarons. The decorative packaging, the prestige surrounding the lauded French establishment, the beauty of the colorful cookies…and did I mention the taste?

IMG_6273 _SnapseedThe chocolate macaron manages to be light and fudgy, the pistachio is nutty, the caramel rich and decadent, and the raspberry sweet and tart, the filling scattered with seeds. The Marie Antoinette perplexed me with the robin’s egg-blue hue and difficult to distinguish flavor profile. A bit of Googling helped me determine it is traditionally black tea and honey, but unfortunately the treat was long-gone by the time of this discovery.

An added perk for receiving such a gift for my birthday? I didn’t have to wait in the (historically long) line, though it is a dream to make it to the original location in Paris. In the meantime, I will stick to visiting one of the New York locations…or wait until next year when the next box will magically appear on my desk.

Until next time,
SugarSource

Unexpected Find: Rice Krispie Treats Re-Imagined

IMG_6089 _SnapseedIt is almost officially summer, and ice cream shops everywhere are opening their stores! On a particularly pleasant weekend day in Brooklyn, I came upon Ample Hills Creamery. A relatively sizable shop, it offers many classic favorites in addition to twists and completely new flavor profiles.

It was on this initial visit that I discovered Snap, Mallow, Pop, the creamery’s take on the favorite rice krispie treat of children and adults alike. The marshmallow-flavored ice cream was sweet and spot-on, with speckles of rice krispies for a chewy texture. While I could only handle a small serving, I had no regrets for choosing this unique flavor. To top it off, I enjoyed each spoonful lounging in a colorful adirondack chair from the sunny rooftop deck.

There are many others that caught my eye, including the Ooey Gooey Butter Cake and Nonna D’s Oatmeal Lace. With summer in full swing, I have no doubt I will be returning to try the others sometime soon…

Until next time,
SugarSource


Spotlight: Mast Brothers, Round Two

Mast Brothers logo,  carved into the cement of their building

Mast Brothers logo,
carved into the cement of their building

After taking a tour of the Mast Brothers Chocolate Factory, I had to try the brew bar down the street. I was in need of another dose of locally produced chocolate.

The storefront looks very similar to the traditional store, but much more sparse. Shelves built into the wall house the chocolate bars available for purchase, and a simple menu behind the counter describes the five to six offerings of the day. They had samples of the chocolate spread on sourdough – delicious. We surveyed the short selection, first attempting to opt for the chocolate beer, which was not available. What a disappointment! It was a popular ask for the customers that trickled in after us, and I may have to visit another day to give the non-alcoholic, carbonated beverage a whirl.

Quickly overcoming the initial dismay of the out-of-stock beer, we chose to try the brewed chocolate and traditional hot chocolate. The brewed chocolate consists of brewed cocoa nibs using a syphon coffee system. It was fascinating to watch from the blonde wood bench – the only seating in the storefront – with the water slowly seeping upward toward the nibs, and bubbling out at the end to produce a brown, translucent beverage. It resembled coffee, but with the scent of chocolate. It was not particularly sweet and didn’t have much of a taste – certainly nowhere near the strong flavors present in their chocolate bars.

The hot chocolate was as expected – very rich, incorporating dark chocolate and not too much sugar, served in a small cup that proved to be more than enough for the group. It took four of us to finish it, and resembled the velvety fullness of a traditional Parisian chocolat chaud.

One new way to experience chocolate (brewed) and one traditional (hot chocolate), and one yet to be tasted (chocolate beer). I guess I will have to visit the establishment once again!

Until next time,
SugarSource

Spotlight: Mast Brothers Chocolate

IMG_5980 _SnapseedMast Brothers Chocolate has emerged as a bit of a sweet landmark in the Williamsburg neighborhood in Brooklyn, New York. A cream-colored exterior does not hint at the chocolate offerings just inside the door. I decided to try the Chocolate Tour to learn more about the company, the process, and to sample some of the local chocolatier’s offerings.

Once inside, you encounter burlap sacks of cocoa beans highlighting the global sources for the sibling-run establishment. The blond wood, white walls and splashes of black do not resemble the factory aesthetic I had in my mind, and the smell was incredible – like being wrapped in a chocolate blanket. A table with brightly wrapped bars occupied the center, and an employee dressed in white approached with a tray of broken pieces, offering a sampling of the Dominican Republic single-origin bar. Delightful!

Everyone gathered in the front entry, where the guide quickly recapped the history of the company – founded by two Iowan brothers – as well as how chocolate is made, beginning with the fruit. She talked about where and why they source, and let us each crack a cocoa bean to taste the bitter nib inside. It only slightly resembled what I think of when I think of chocolate.

Then it was off to the back of the store to learn about the roasting process, how husks and nibs are sorted (through a vacuum contraption) and how chocolate is mixed together (in large rotating metal buckets with multiple stone wheels for grinding). The single-origin bars are solely cocoa beans and sugar, with the cocoa percentage determined by the beans-to-sugar ratio. A batch with 7 pounds cocoa, 3 pounds sugar is considered 70% cocoa and a part of the beans-to-bar trend that has emerged. After sampling the chocolate liquid in the middle of mixing – you could still distinguish the occasional sugar granule – we saw where they age the mixtures. Like cheese and wine, the brothers believe aging the chocolate further develops the taste and fosters a deeper, richer experience. It is a much shorter process – one to three months – but surprised me nonetheless. Once sufficiently aged, the chocolate is heated once again, distributed into molds, chilled and wrapped in prints custom-designed by a mind formerly of the fashion world. For the single-origin bars, the outline of the country is often incorporated into the paper and the effect is stunning.

Finally the tour concluded with the much-anticipated tasting. Similar to a wine tasting, we were instructed to taste the pieces of chocolate in a certain way to assess both the texture and the subtle notes hidden in the velvety layers. Everyone on the tour consumed at least half a bar each, attempting to identify the nuances and sipping on water for reprieve as we moved from a bar with a lower percentage of cocoa (70%) to one more concentrated (76%). Given the opportunity (and a little prompting from our guide), we could find subtle distinctions like blueberry and lime, developed as a result of differing climates, soils and continents. Here I think it is important to provide a disclaimer. While I am a serious sugar fan, the tasting was a bit of a struggle toward the end. With sweet after sweet and no salt to offer a break for my palate, I was a little fatigued by the end.

In my chocolate-induced haze, I ended up purchasing a 12-bar box, as the most intriguing varieties were not included in the sampling such as sheep’s milk, goat’s milk, and vanilla and smoke. While the prices are a little steep, the tour opened me to a new way to experience and taste chocolate. Mast Brothers is most likely not going to turn into an everyday indulgence, but is a welcome change of pace from the other bars I had been alternating in my pantry. They have a brew bar next door where they stir up cocoa beverages, which I have since added to my “must try” list…

Until next time,
SugarSource