 I stumbled upon this coconut marshmallow recipe over a year ago, and finally decided to make it this year. If you have ever thought about trying your hand at homemade marshmallows, give these a whirl! They are a fantastic accompaniment to a cup of hot cocoa, provide a twist on the traditional s’more and are delicious on their own.
Ingredients
– 3 pkgs unflavored gelatin – water – 1 1/2 c. sugar – 1 c. light corn syrup – 1/4 tsp salt – 1 Tbsp vanilla extract – powdered sugar – sweetened shredded coconut
Directions
If the coconut you purchased is sweetened and shredded but not toasted, you can quickly toast it in a large skillet. On medium heat, it will take 5-7 minute total for roughly 12 ounces of coconut. A few pieces will brown here and there, and then suddenly anything that it touches the bottom of the pan will be toasted in a flash. At this stage, stir constantly for even toasting and to avoid burning. Set aside – this step can be completed hours before the next!
Combine 3 envelopes or packages of gelatin and 1/2 cup of cold water in a stand-up mixer. You will need the whisk attachment in a few steps – this is a great time to ensure it is in place.
 In a small saucepan, mix the sugar, corn syrup, salt and 1/2 cup water, cooking on medium. Once the sugar has dissolved, increase to high and cook until the mixture reaches 240 degrees on a candy thermometer. It will be boiling – that is to be expected – but watch for any bubbling that could spill over the edges. If this happens, pick up the pot and set it back on the burner once the bubbling as subsided.
Another tip: any sugary mixture that has hit the sides of the pot may start to burn, particularly at the top of the saucepan. I removed my smoke detector temporarily as I noticed this starting to happen. However I returned it immediately once I completed the next step. Safety first!
On low speed, add the hot sugar syrup to the gelatin in the mixer. Be careful, as the mix was just boiling a moment ago. Once combined, whip on high for 15 minutes. It will resemble a meringue, but will be heavier. Add the vanilla, and mix until well-combined.
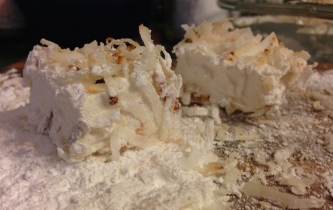
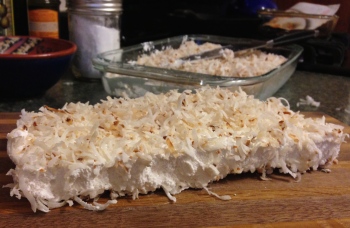
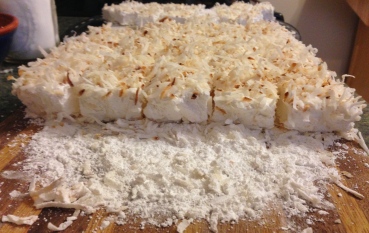 In a 13″ x 9″ glass pan (I used Pyrex), heavily dust the bottom with powdered sugar and then sprinkle roughly half the toasted coconut on top. Pour the marshmallow mixture next, and use a spatula to smooth out the surface. It will be sticky! Sprinkle the remaining coconut and allow to dry overnight – at least 12 hours.
Once dry, use a sharp knife to cut along the edges of the pan and flip onto a cutting board to slice into rectangles, squares or whatever shape you prefer. I chose to cut my marshmallows in sections due to the size of my cutting board. Roll each side of every marshmallow in powdered sugar, as they will be very sticky otherwise. Eat immediately, share with loved ones, or store in an airtight container. And most importantly – enjoy!
Until next time,
SugarSource
P.S. For easy clean-up, put water in tea kettle and set it on high while you are slicing. When you are done with the marshmallows, place your pan in the sink and pour the boiling water over the dish, paying particular attention to the areas where the mallow stuck the most. You can also occasionally run the knife under hot water if you find it is starting to gunk up as you use it!
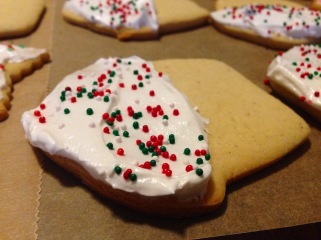 Holiday baking is in full swing! One of my favorite Christmas memories is sinking my teeth into one of my Grandma Ruth’s sugar cookies. I finally decided to take a stab at the treats, and was pleasantly surprised to discover how simple they were to make, outside of the seven-minute frosting. I have a feeling they will become a part of my annual holiday rotation in her honor, though this recipe can be used for any time of year with the appropriate cookie cutter!
 When you are ready to bake, preheat the oven to 400 degrees F. Cut off 1/4 of the dough and roll out on a lightly floured surface to roughly 1/4″ thickness. Use any cookie cutter you wish, placing on ungreased cookie sheets.
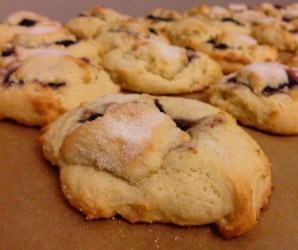 My mother and her friends have a cookie party tradition that dates back over thirty years! One of my favorites were the “Christmas Mountain Cookies” a family friend always brought, and one year she finally relented and showed me how to make them. Though they are a bit tedious when it comes to preparation, they are beloved in our home. The good news is that they are worth the effort, and I firmly believe your friends and family will agree!
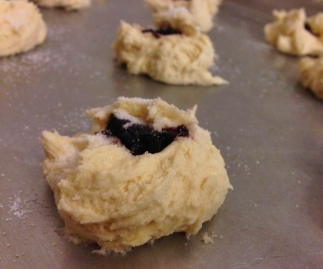 Once the sheets are full, make a small indentation in the center of each cookie, filling with a small amount of raspberry spread. You do not want to use a raspberry jelly, as it will most likely run, and want to be careful near the edges.
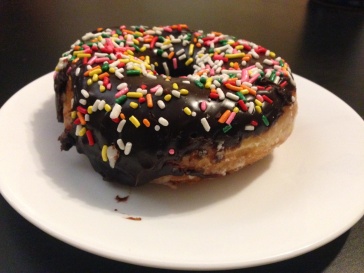 Donuts
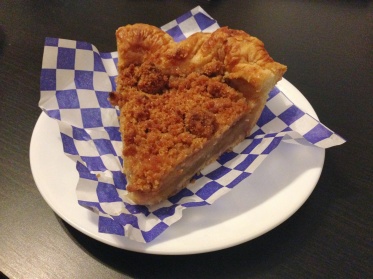 Pie
Pie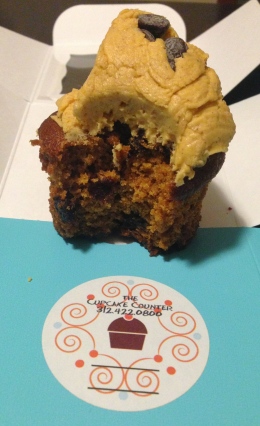 Cupcakes
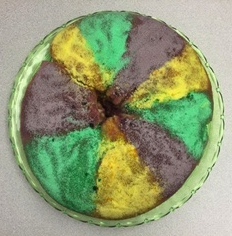 In honor of Mardi Gras, I attempted to bake a traditional King Cake. I modified a recipe from Nola.com, which seemed to be an appropriate source for such an endeavor.
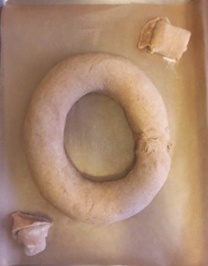 Once the dough has chilled for two hours, punch the surface down and turn out onto a lightly floured surface. First shape the dough directly with your hands – you are looking to achieve a rough rectangle. Then, using a floured rolling pin, slowly roll the dough to a rough 24″ by 12″ size. Continue to run your fingers or a spatula underneath the dough to ensure it isn’t sticking to the surface.
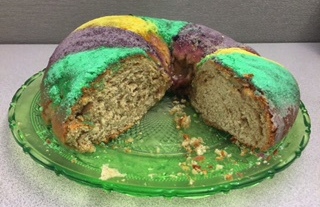 After the cake has had the chance to cool completely – I left for a few hours with the clean dish towel draped over the top – mix 2 cups of powdered sugar with 1 tablespoon of milk (again, I used the KitchenAid stand mixer for expediency). Slowly and cautiously add additional liquid as needed – you do not want it to be too liquidy. Drizzle the icing over the cake. My first icing unfortunately had too much milk, so I used it more as a glaze with my pastry brush. You can either dye the icing in the traditional yellow, green and purple of Mardi Gras, or coat the icing in colored sugars. I chose the sugars, which I like both aesthetically as well as texturally, and