Travel Spotlight: Chicago Sweets Revisited

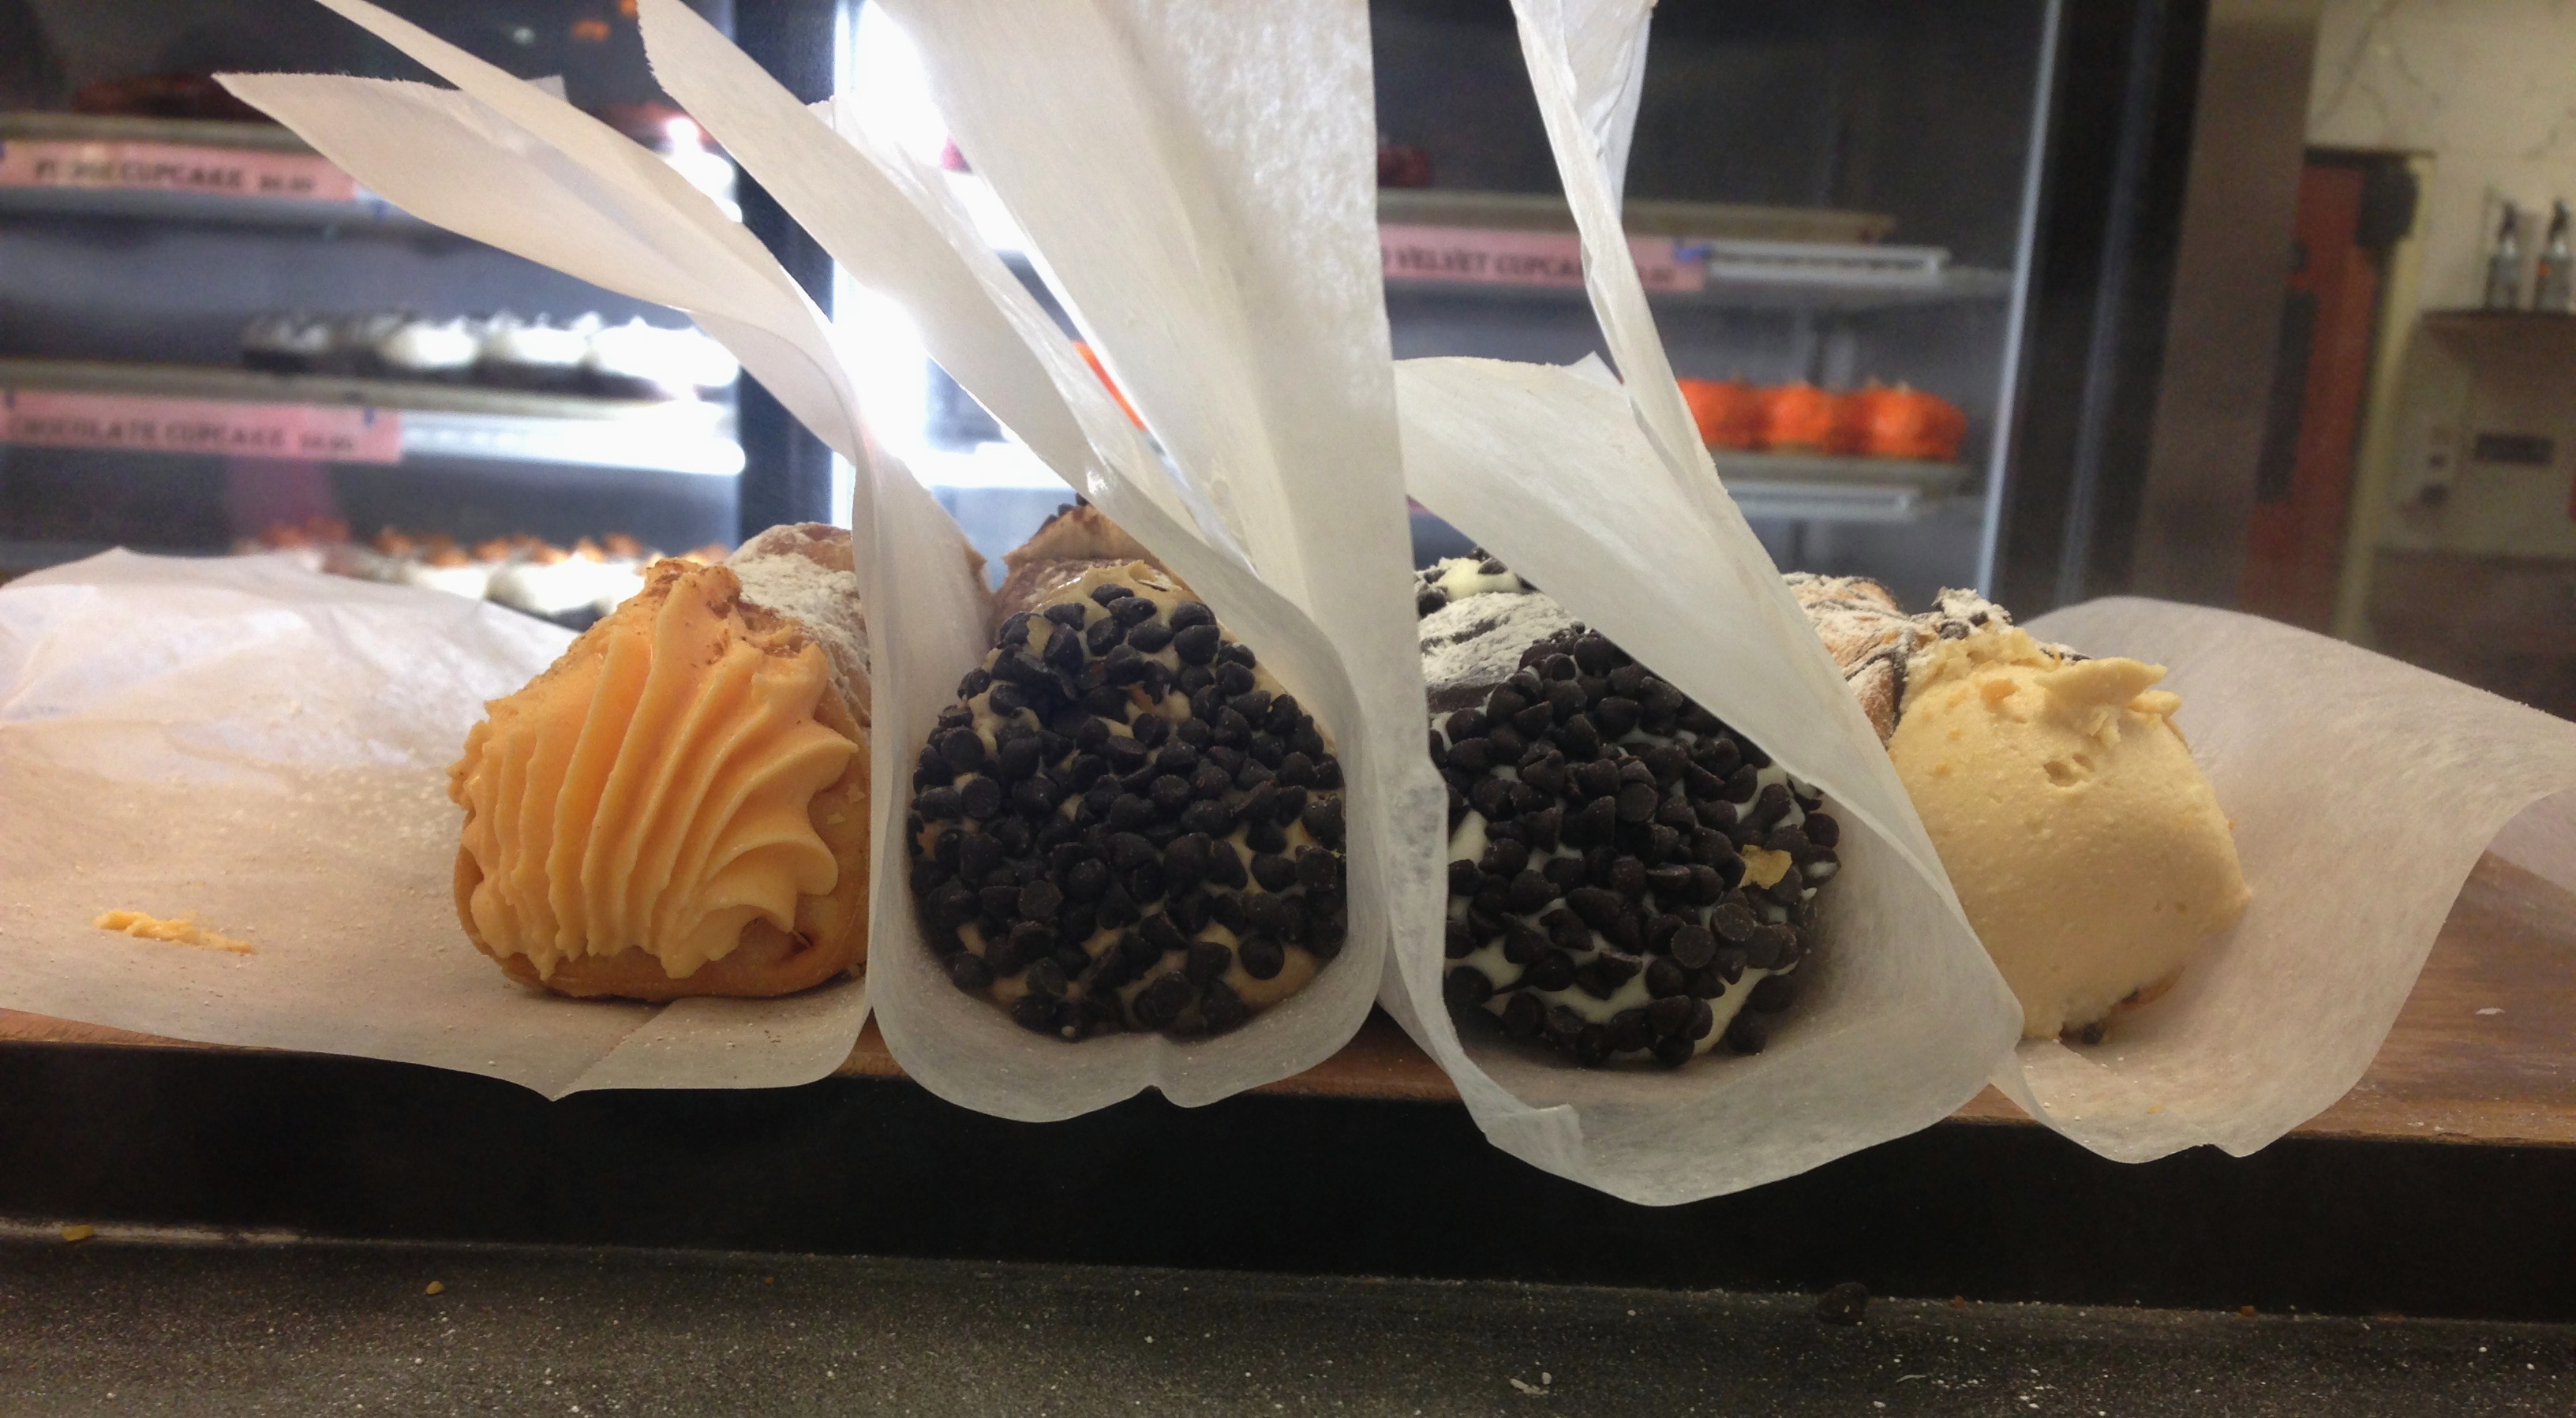
It has been quite some time since I provided my initial recommendations for Chicago’s sweets landscape. With a recent visit to the city, I gave some new establishments (at least new to me!) a try.

img_8475-_snapseedDonuts
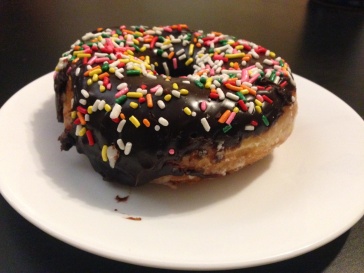
As we walked around Chicago, we noticed several Stan’s Donuts locations. After a particularly long stroll one Saturday afternoon, we decided to try a few treats for an afternoon snack, as we had not heard of this bakery before. I chose a standard – Chocolate Sprinkled Glazed – and was pleasantly surprised by the texture and taste of the icing. On the surface it appeared to be a basic offering, but the quality of the ingredients really showed, resulting in a delightful bite each time.

From Yelp recommendations, we also elected to try the Peanut Butter Banana Pocket, which was dripping in a thick coat of icing. I must say, this one did disappoint. For all of the flavors incorporated into the pocket, nothing in particular stood out. The peanut butter and banana seemed to rarely meet, and the experience was underwhelming.

I will absolutely revisit Stan’s again, electing for the simpler (and to me, more satisfying) selections.

img_8460-_snapseedPie
Bang Bang Pie & Biscuit came highly recommended from several sources as a must-try in Chicago. With the changing leaves and dropping temperatures, it feels like the perfect weather for a biscuit and a slice of pie, so we decided to check it out last weekend.

We visited the location near the Blue Line California stop. The flow of the establishment itself was confusing. Despite having two doors, the staff insisted that the line proceed outside, instead of inside, the establishment on the blustery Sunday afternoon. You could hear a few murmurs of frustration as the queue shifted to accommodate the request.

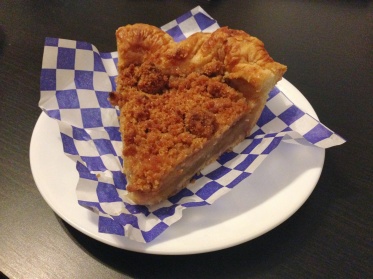
Once finally at the counter, we ordered a slice of apple and a slice of the chocolate chess to try something new. The apple was nice – not too heavy on the cinnamon or goopy like some fruit pies are, and overall hit the spot for those looking for a classic. At $6 a slice, however, it is not going to be a regular indulgence.

The chocolate chess, on the other hand, was disappointing. A layer between the rich but grainy dark chocolate filling and the crust possessed a strange, gummy texture. Described as brownie-like by the cashier, it unfortunately did not resemble this treat.

Based on the overall experience and expense, I may opt to bake my own instead! The chocolate chip cookies did look pretty good though (and were the size, roughly, of a dinner plate) so I may give this place one more chance.

img_8481-_snapseedCupcakes
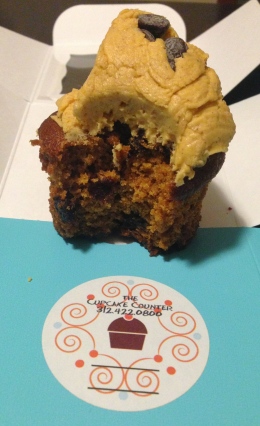
After discovering many of the places I had previously tried have since closed, I jumped at the chance to try a new establishment. The Cupcake Counter looked like a small, family-operated bakery and I stopped in to try a seasonal selection – the pumpkin chocolate chip cupcake.

Opting to enjoy the treat at home, I was disappointed to discover the default was to place the frosted cupcake into a paper snack bag, which was sure to impact the presentation. The employee said boxes were available for an additional $0.85, a disappointing and seemingly unnecessary upcharge for a cupcake establishment. Opening the box when I arrived home, I discovered the cupcake had been placed sideways in the box.

The pumpkin cake didn’t have much flavor. While moist, it was quite heavy and dense. The pumpkin frosting had a great cinnamon richness, but did not pair together well with the cake itself, competing with one another instead.

Overall the customer service experience and the taste of the cupcake itself ensure Cupcake Counter will remain off of my recommendations list.

Until next time,
SugarSource


Travel Spotlight: Please and Thank You

We were in Louisville for Thanksgiving, and as we went for a post-meal walk, we discovered a cute little coffee shop on Frankfort Ave called Please & Thank You. Closed that day, we decided to retrace our steps that weekend to check it out.

The coffee was good and provided the necessary caffeine boost we were looking for, and the breakfast panino was simple and filling. The real star of the visit, however, was their chocolate chip cookie. Shards of dark chocolate dotted every bite of the soft treat, and it was gooey in the middle with a texture reminiscent of slightly under-baked cookie dough. I wish I had snapped a photo or two, but was too engrossed in the experience. Quite rich, we had to split one but immediately purchased a bag to-go, as we felt compelled to share the delights with friends and family.

If you ever find yourself in Louisville, this is a must-try. They were voted Louisville’s Best Chocolate Chip Cookie for a reason!

Until next time,
SugarSource

Travel Spotlight: Galapagitos


IMG_7381 _Snapseed

We had the opportunity to visit Ecuador this past September and had an incredible time. As we reflect on our trip, Galapagitos resemble the pink and white frosted animal crackers sold in America today but are slightly different. They are smaller, coated in milk chocolate and absolutely covered, front and back, in multicolored non-pareils. The tiny sprinkles contribute an added crunch to the treats.

Upon returning to the States, we searched for Galapagitos, both online and in-store, to no avail. We felt we had no choice but to attempt to recreate them at home. It requires only three ingredients and a little time, but we found it was absolutely worth it and loved introducing friends, family and coworkers to the treats. IMG_7365 _Snapseed

You will need animal crackers (we chose Keebler), milk chocolate chips (Ghiradelli for this last round), and a shaker of non-pareils. For a 13-ounce bag of animal crackers, we found we needed 2 12-ounce bags of chocolate chips to properly and fully coat the crackers.

After tempering the chocolate over a double-boiler (created by layering a Pyrex bowl over a sauce-pan with a 2-inch layer of boiling water), we quickly dipped the whole animal crackers into the chocolate. Once completely covered, we placed them on a baking sheet covered in parchment (or wax) paper. While one of us did the dipping, the other did the sprinkling. To ensure they are completed coated on both sides, I would recommend pre-sprinkling the parchment-lined baking sheet.

IMG_7379 _Snapseed
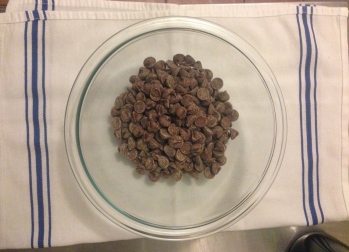
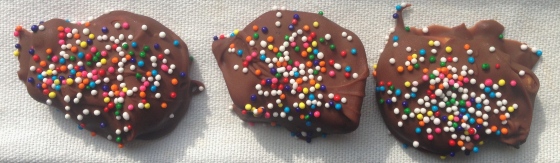
To quickly cool, we pop these into the freezer. They are ready for guests to enjoy within the hour, and last for 1-2 weeks (though we have found they are long-gone before then).

Until next time,
SugarSource

Recipe: Traditional King Cake

IMG_6355 _Snapseed
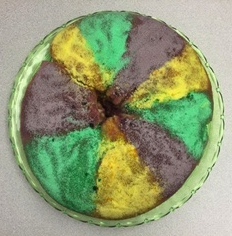
In honor of Mardi Gras, I attempted to bake a traditional King Cake. I modified a recipe from Nola.com, which seemed to be an appropriate source for such an endeavor.

Ingredients
– 5 c. flour  – 1/2 c. sugar  – 1 1/2 tsp salt  – 2 packets instant yeast  – 3/4 c. whole milk  – 1/2 c. water  – 1 c. butter  – 3 eggs  – 1 tsp lemon zest  – 1 Tbsp cinnamon  – dash of nutmeg  – 1 tsp vanilla  – powdered sugar

Recipe
Combine the milk, water and butter in a small saucepan on the stove. Slowly bring up the heat, stirring occasionally. You are looking to reach 120-130 degrees (for reference, milk boils at over 200 degrees Fahrenheit). I used a small candy thermometer to pace properly.

In a mixing bowl (I used my KitchenAid stand mixer), combine 1 1/2 cups of flour with the sugar, salt and instant/rapid yeast. Once the liquid on the stovetop has reached 120 degrees, combine with the flour mixture and mix on medium speed for two minutes. You will start to smell the yeast activating – it will not resemble a traditional cake batter (and it’s not supposed to!).

Add 2 eggs, 1 egg yolk, 1/2 cup flour, lemon zest, cinnamon, a dash of nutmeg (1/8 teaspoon would be fine) and vanilla. Beat on medium-high speed for two minutes, stopping to scrape the sides occasionally, then slowly add in the remaining 3 cups of flour.

Transfer the dough to a large bowl coated with cooking spray. You want to ensure the dough has room to expand. Cover in plastic wrap and refrigerate for two hours.

IMG_6351 _SnapseedOnce the dough has chilled for two hours, punch the surface down and turn out onto a lightly floured surface. First shape the dough directly with your hands – you are looking to achieve a rough rectangle. Then, using a floured rolling pin, slowly roll the dough to a rough 24″ by 12″ size. Continue to run your fingers or a spatula underneath the dough to ensure it isn’t sticking to the surface.

Melt 2 tablespoons of butter, and brush onto the surface of the dough using a pastry brush. Lightly sprinkle cinnamon and sugar (I combined 1/3 cup sugar and 1 tablespoon of cinnamon into a shaker) across the entire surface, aiming for even and complete distribution. Beginning on one of the long sides, roll the dough tightly. You are aiming for a long thin log, not a short thick log. In my first attempt I almost started rolling from a short end but quickly caught my mistake!

Transfer the roll onto a baking sheet lined with parchment paper, shaping into an oval and pinching the ends together to complete the ring. I sliced off the uneven end pieces, baking them separately to give me a sense of the cake’s composition (you see them in the photograph above). You want to leave as much space in the middle of the oval as possible, as the dough expands quite a bit.

Cover the dough ring with a clean dish towel and place in a warm area of the house for about an hour. You are proofing the dough, a key step with yeast-based dough.

Preheat the oven to 375 degrees, and bake for 25-30 minutes until golden brown. Carefully check the center of the round to ensure it has properly cooked through. Let it cool on the pan for 5 minutes, then transfer to a baking rack to cool completely. For the transfer, use two spatulas. Do not attempt to solely pick up the parchment paper – this is a sure way to lose the cake you just baked!

Decorating
IMG_6358 _Snapseed
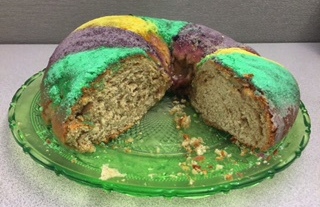
After the cake has had the chance to cool completely – I left for a few hours with the clean dish towel draped over the top – mix 2 cups of powdered sugar with 1 tablespoon of milk (again, I used the KitchenAid stand mixer for expediency). Slowly and cautiously add additional liquid as needed – you do not want it to be too liquidy. Drizzle the icing over the cake. My first icing unfortunately had too much milk, so I used it more as a glaze with my pastry brush. You can either dye the icing in the traditional yellow, green and purple of Mardi Gras, or coat the icing in colored sugars. I chose the sugars, which I like both aesthetically as well as texturally, and made them myself because I couldn’t locate them in local stores!

The cake absolutely needs the icing and additional sugar, as it is not a particularly sweet batter. It is at this stage where you can add the traditional “good luck” baby as well. You do not want to ever actually bake plastic into the cake, but instead insert after the cake has cooled through the bottom. We used a small plastic dinosaur from the 99 cent store, putting our own personal twist on it.

This easily serves 14-16 people, depending on the voracity of appetite. Once the cake has been cut, this starts to dry out almost immediately. If somehow you manage to have a section left, I would allow it to dry out completely to use the remaining bread in a simple bread pudding. Enjoy, and Happy Mardi Gras!

Until next time,
SugarSource

Travel Spotlight: The LA Cookie

IMG_7319 _SnapseedLos Angeles is known for wonderful weather, sunshine, juice cleanses…but not necessarily delicious (and not nutritious) baked goods. That was partially why I was so surprised to discover the absolute deliciousness of the Mocha Chip Cookie at The Line Hotel’s CaFe.

Innocuously displayed alongside other pastries, the Mocha Chip Cookie had a slight sheen to it, with sprinkles of salt dotting the surface. It was only when I noticed the tiny font identifying this selection as an LA Weekly’s Best Cookie that I knew I had to try it.

I was unprepared. The surface crackled slightly as I took a bite. I was immediately struck by how densely rich and chocolately the cookie was, and how much I had underestimated it. I had to share it with several others, as it was too much for me to handle alone. They were all surprised to find it fudgy and decadent, as the exterior gives almost no indication of the wonder within.

If you ever find yourself in the Koreatown area of L.A., I highly recommend swinging by to grab one of these cookies. A great accompaniment to a cup of coffee or as an afternoon pick-me-up, this delight is worth the trip.

Until next time,
SugarSource

Spotlight: Croissant Class – Take Two

IMG_7298 _SnapseedAfter initially taking the croissant class at Mille Feuille in December, I thought I was ready to tackle baking croissants. The course may have left me a little overconfident, and my first batch proved to be less-than-appetizing. With that in mind, I wanted to share my top tips:

  • Do not let the dough proof before you have rolled and assembled your croissants. Upon departing Mille Feuille, I proceeded to run errands for hours, allowing the dough plenty of opportunity to rise in my purse. Though it did not make it mess, it did complicate the rolling and proofing process once I was ready to make use of it.
  • Related, but somewhat different: do not allow your dough to get too warm. The butter will start to melt, reducing the overall flakiness of the pastries.
  • Do not attempt to use the dough after a few days. The yeast will slowly lose its ability to activate.
  • Do use a good amount of flour to help with the rolling process, but do not forget to brush it off before you assemble or proof the pastries. Excess flour can lead to a bitter or distorted taste.
  • If you do not have a convection oven, placing an empty baking sheet below the sheet with pastries helps to create a convection-like environment.
  • Do not forget the egg wash step after proofing! Croissants have that beautiful golden-brown hue because of this step and it should not be overlooked. Otherwise, they may turn out like the above!

I will give croissants another shot, from start to finish in my own kitchen, using the directions provided by the instructor.

Until next time,
SugarSource

NYC Spotlight: High Tea at The Plaza

IMG_7119 _Snapseed

High tea is a rare indulgence, and The Plaza’s Palm Court is quite the decadent place for such an occasion. I finally took the plunge, as it was a bucket list item of mine, and did not regret it!

Nestled into one of the green velvety booths, we poured over the tea menu to make our selections while taking in the opulent dining room. Gorgeous flower arrangements, shiny mirrored surfaces and the clientele all provided quite the sensory experience.

IMG_7121 _Snapseed
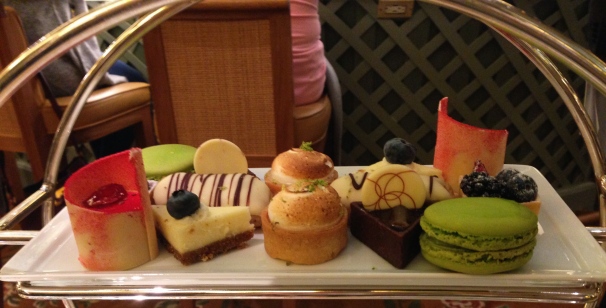
After placing our order, we clinked our glasses – in a truly luxurious move, we chose to accompany our afternoon tea with champagne – and continued to take in our surroundings. Before we knew it, our individual pots of tea arrived with cards confirming our selections, followed closely by a three-tiered golden tray. The table provided a reflection of our miniature sandwiches – traditional crustless cucumber, lox (for a nod to the Big Apple), egg salad, turkey and cranberry, chicken salad and an itty bitty roast beef baguette. They were quite filling for being so small!

The scones were warm and enveloped in a silken napkin. The small pots of devonshire cream, lemon curd and preserves were quickly employed on the surfaces of the plain scones, adding a rich sweetness to the dense texture and melting from the subtle heat. The seasonal scones did not seem to warrant such an accompaniment, and were also wonderful (I saved mine for consumption later).

IMG_7125 _Snapseed
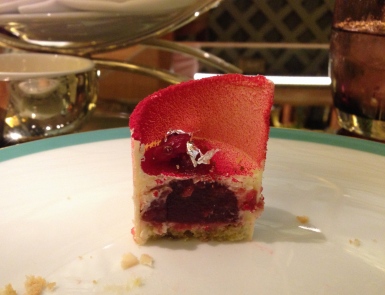
The desserts, the true highlight, were delightful. The miniature key lime tart was sweet, the meringue spongy and the filling had a bite to it. The fruit tart was tiny, and the berries made a strong statement. I am not a fan of cheesecake, generally speaking, but was happy to sample the Plaza’s version (though unfortunately it did not convert me completely). The tiny black and white eclair was quickly forgotten, while the intensely chocolately orange triangle was the highlight, flavor-wise. The most stunning execution was the white chocolate and cranberry cake, which made up for the lack of strong fruit notes with the beauty of the assembled package, while the pistachio macaron turned into my second to-go item.

It is quite the filling experience. I recommend replacing lunch with such an excursion, as the trays provide more than enough sustenance for a meal. Absolutely worth trying once, I don’t anticipate I will turn into a Plaza regular any time soon!

Until next time,
SugarSource

Spotlight: Ladureé Ladureé

Another birthday has come and gone and would not have been complete without a box of Ladureé macarons. The decorative packaging, the prestige surrounding the lauded French establishment, the beauty of the colorful cookies…and did I mention the taste?

IMG_6273 _SnapseedThe chocolate macaron manages to be light and fudgy, the pistachio is nutty, the caramel rich and decadent, and the raspberry sweet and tart, the filling scattered with seeds. The Marie Antoinette perplexed me with the robin’s egg-blue hue and difficult to distinguish flavor profile. A bit of Googling helped me determine it is traditionally black tea and honey, but unfortunately the treat was long-gone by the time of this discovery.

An added perk for receiving such a gift for my birthday? I didn’t have to wait in the (historically long) line, though it is a dream to make it to the original location in Paris. In the meantime, I will stick to visiting one of the New York locations…or wait until next year when the next box will magically appear on my desk.

Until next time,
SugarSource

Travel Spotlight: El Postre de Oaxaca

IMG_5720 _SnapseedOaxaca is known for many things – energetic culture, beautiful textiles, intricate pottery, incredibly stringy cheese – and chocolate, which was heartedly embraced during a recent trip to this vibrant Mexican city. It was a phenomenal experience with a few particularly sweet highlights.

Malteadas at Chocolate Mayordomo. Milk and chocolate powder (ground right there in the store) are combined using a malt machine until thick, uniform and delicious. The addition of coffee tipped this drink into one of the top dessert experiences of the trip. Satisfying, sweet but not too sweet, richly chocolate and decadent, it was easy to sip but too filling for one person to finish.

The Chocolate Orgasmo at La Jicara. This small bookstore cafe offers a nice break from the Zocalo and more congested areas of town. The chocolate orgasmo, a semi-sweet flourless cake topped with a tangy raspberry sauce, provides the perfect afternoon boost, especially when paired with an Americano. A silken texture and dense chocolate flavor makes this a delightful pick-me-up.

Traditional hot chocolate from the shop off of the Tlacolula market. Hot chocolate here is a specialty – one can order a customized combination of vanilla, cinnamon, almonds, chocolate and sugar based on preferences or traditions. At this small shop off of the huge Sunday market, employees blend ingredients using grinders upon customer request. We observed these goings-on while sipping the house blend – a comforting concoction of cinnamon, chocolate and sugar – and nibbling on sweet rolls with a crisp sugary shell on top. A highly recommended experience – and the hot chocolate cups for sale are incredibly reasonable in addition to being beautiful!

IMG_5564 _SnapseedChocolate atole. This drink is commonly consumed to kick off breakfast and can be found at roadside stands and restaurants alike. Similar to a liquid porridge, it has a grainy texture due to the corn mixture used as the base. The chocolate is vigorously combined with the corn using a wooden utensil, rotated until froth builds along the surface. This is not particularly sweet and is not a flavor or texture common in American cuisine, so it will not solicit the same reaction from children as a traditional French chocolate chaud. However, that should not deter you from sampling one as a part of exploring the local cuisine!

The chocolate tamale at Las Quince Letras. It took two tries – I accidentally managed to order a hot chocolate the first time around (unintentional yet delicious) – but I was finally able to sample a chocolate tamale. Expecting a chocolate filling in a traditional tamale, the dessert’s appearance surprised me. The dark brown tamale was placed atop a streak of tangy passion fruit puree and accompanied with a few orange slices, proving my assumption incorrect. The citrus helped to break up the intensely rich decadence of the tamale, and it quickly disappeared from the forks of the group.

I would recommend spending at least a week in Oaxaca, as I have captured but a minute slice of the culturally rich and dynamic city.

Until next time,
SugarSource

Travel Spotlight: Mike’s Pastry

DSC_0242 _SnapseedA trip to Boston this past October would not have been complete without a journey to Mike’s Pastry. Having missed out on this experience during past visits, it was a must-try, a bucketlist item for Beantown.

The crowd was at first overwhelming. People seemed to be standing in semi-formed lines, snaking through the entire storefront and spilling onto the sidewalk in a marginally orderly fashion.

Reviewing the plethora of choices and plastic pictures posted along the back wall, we debated the flavors. It was tough to make a decision and before we knew it, we were up, the employee’s hand poised at the ready, grasping a disposable paper. We opted for a strictly cannoli-oriented experience. It is, after all, what this legendary establishment is known for. Selecting the pumpkin spice, chocolate dipped, espresso and peanut butter versions, we surveyed the scene, taking in the additional sweets available for purchase. Decadent whoopie pies, frosted cupcakes, little Italian cookies all beckoned but we held fast, watching as the skilled worker crowned each with a dusting of powdered sugar.

IMG_5025 _SnapseedThe weight of the box surprised us as we made our way outside to eat. The crunch of the chocolate-dipped version combined with the smoothness of the chocolate was wonderful. The pumpkin spice did not particularly remind me of pumpkin or fall, but possessed hints of the quintessential pumpkin spice combination of nutmeg and cinnamon. The espresso was certainly coffee-infused, and the peanut butter was exactly as expected – luscious, flavorful and filling from the first bite.

Overall, they were delicious – the chocolate-dipped was definitely my favorite – and quite substantial. One cannoli per person total, and we barely managed to finish them as a group (we felt morally obligated to not leave a morsel behind). Walking away, wiping the last remnants of powdered sugar from my fingertips, I couldn’t help but think about the other desserts that had been left behind, the non-Italian staples that had looked tantalizing behind the glass counters. Guess another excursion is necessary…

Until next time,
SugarSource